Once your invoice is paid, server deployment begins immediately. Upon completion, you’ll receive an email containing your login credentials. To connect from macOS:
STEP 1:
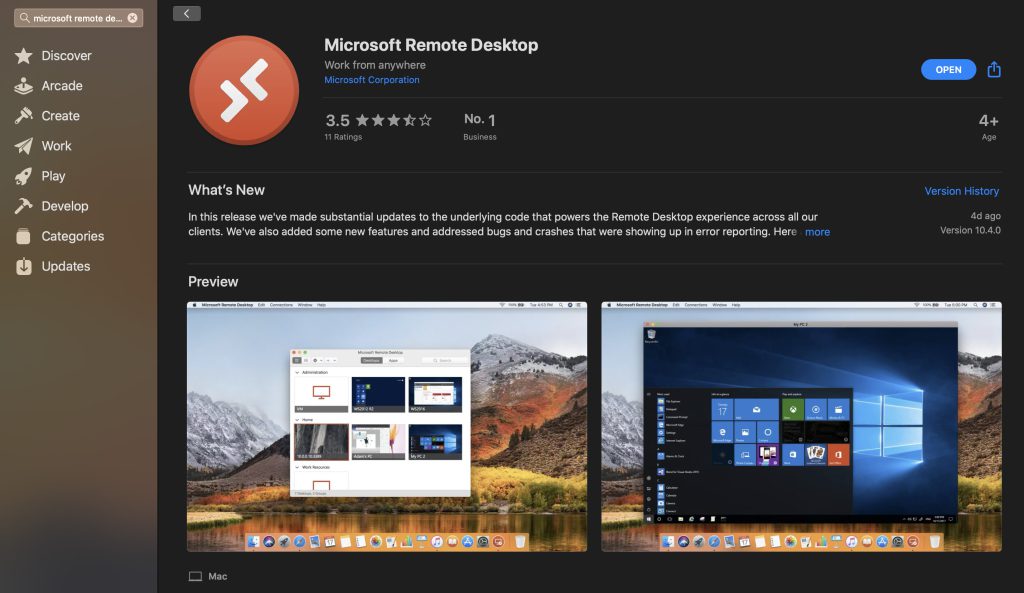
Download the “Microsoft Remote Desktop” app from the App Store.
STEP 2:
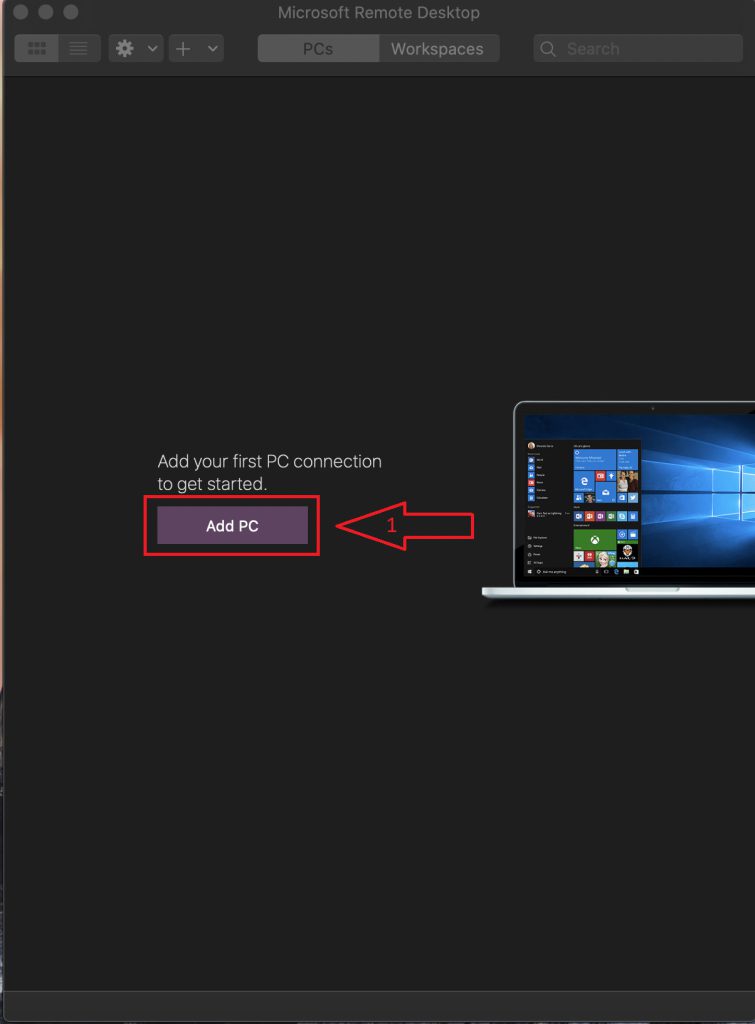
After launching the application, click on Add PC.
STEP 3:
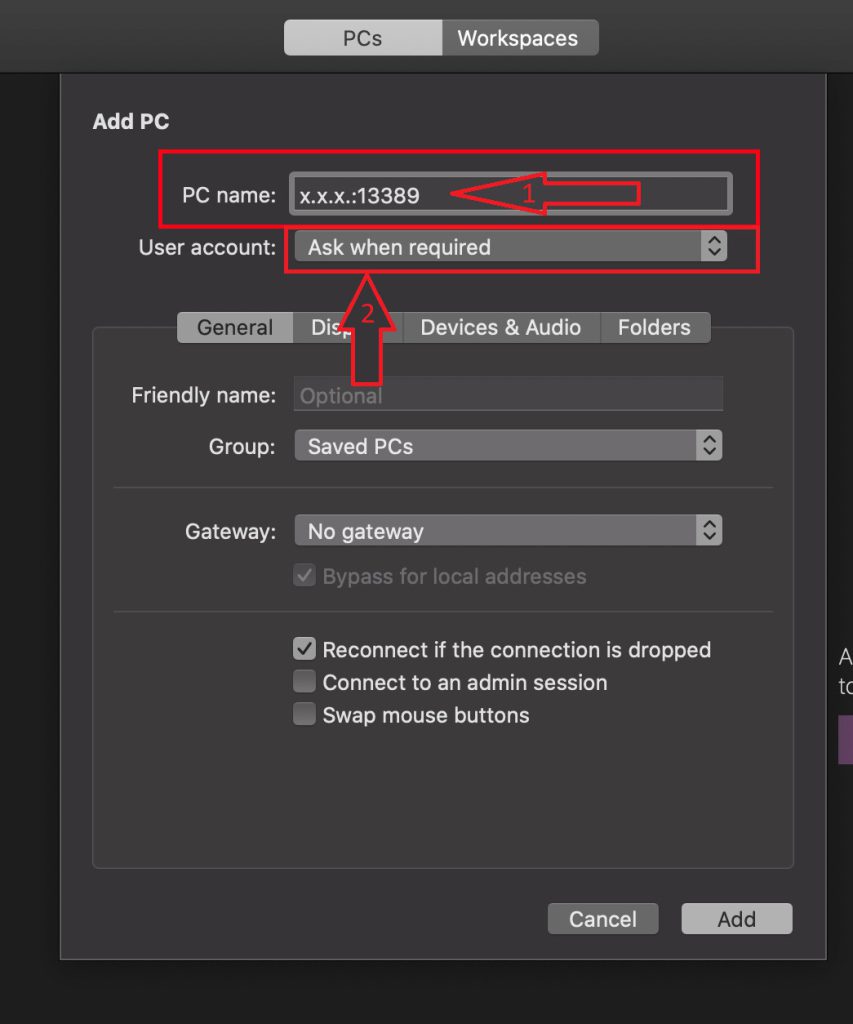
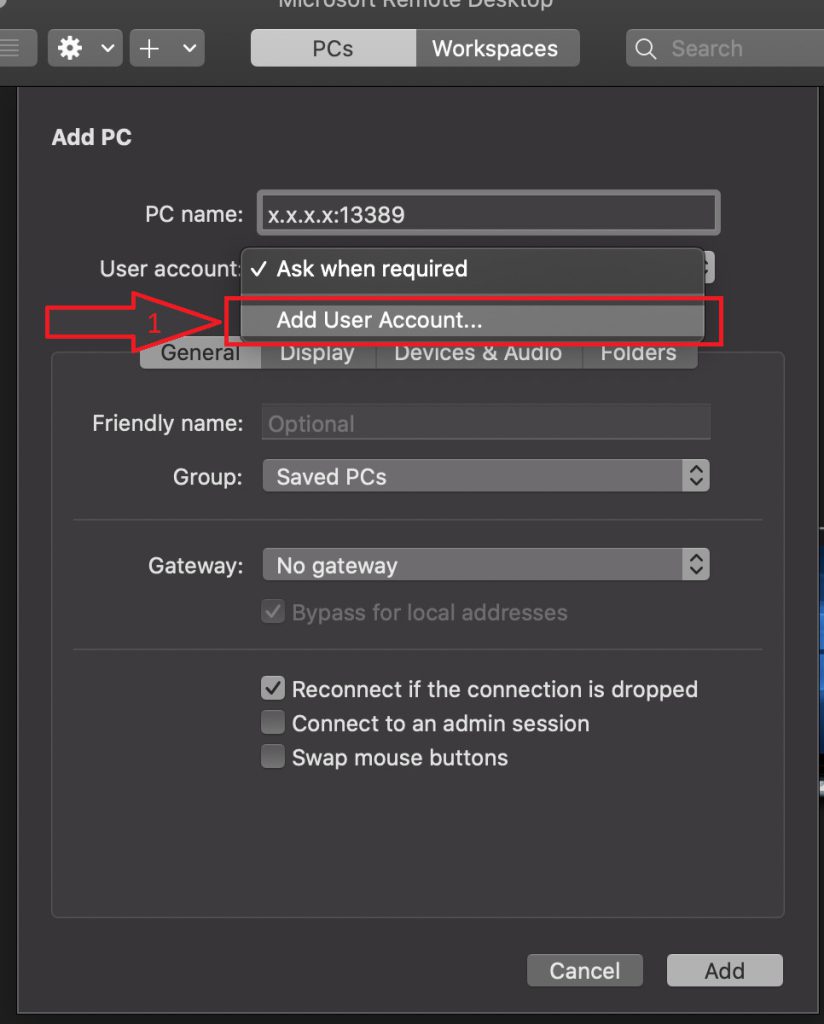
In the PC name field, enter the IP address of your new server from the activation email in this format: x.x.x.x:13389, where x represents the server’s IP address. Be sure to include the port number after the IP.
Once you’ve entered the IP address, click on the User account drop-down menu.
STEP 4:
Click on User Account, and a new window will appear.
STEP 5:
Enter the credentials provided in the server activation email, then click Add.
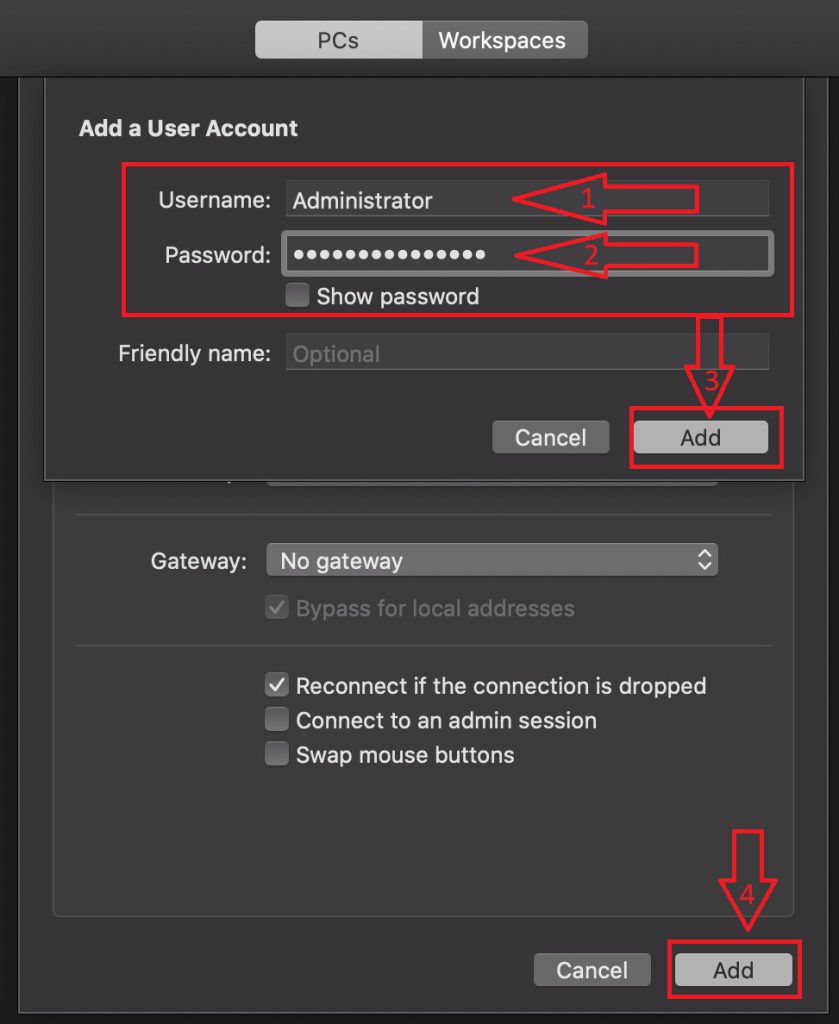
Please note: This is where spaces can accidentally be included in the username or password fields. Be sure to carefully select and copy your credentials from the activation email, ensuring no extra spaces are copied.
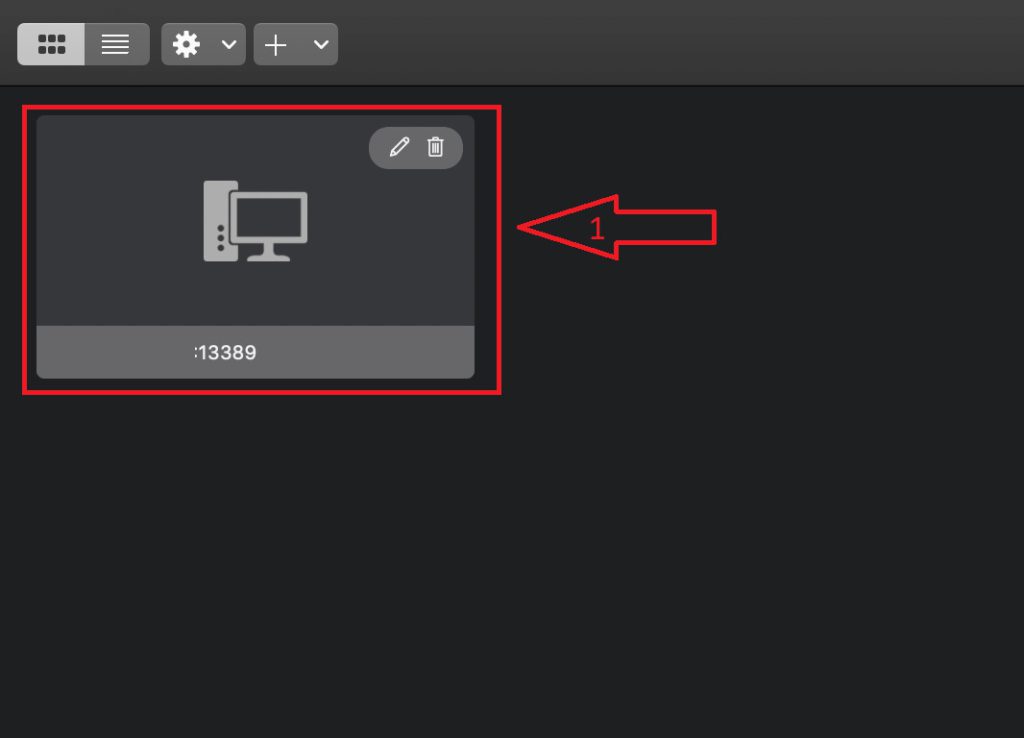
STEP 6:
Your added server will be displayed; click on it.
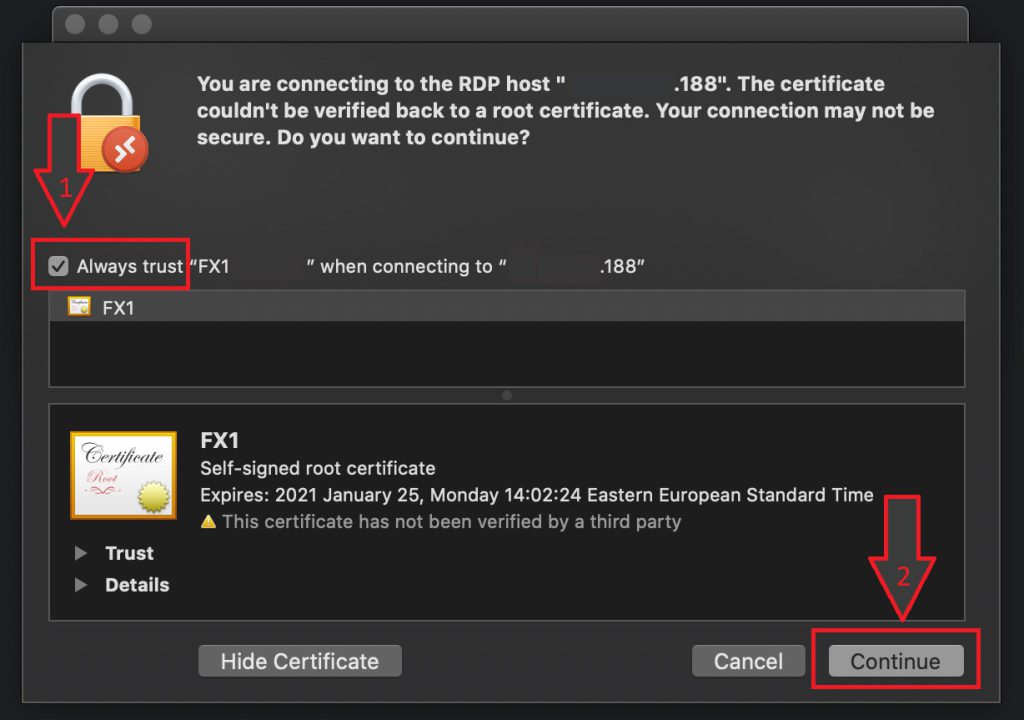
STEP 7:
Check the box for Always trust… and then click Continue.
STEP 8:
If everything has been set up correctly, you should see your server’s desktop.